How to Make a 3D Skeleton Model
Creating a 3D skeleton model is a complex and challenging task in the field of 3D modeling, but it's also a foundational skill across many industries. From game development and animation to medical simulations, 3D skeleton models play a crucial role. This article will delve into the detailed steps involved in making a 3D skeleton model, providing practical insights that can help you improve your modeling design.
Understanding Basic Skeletal Anatomy
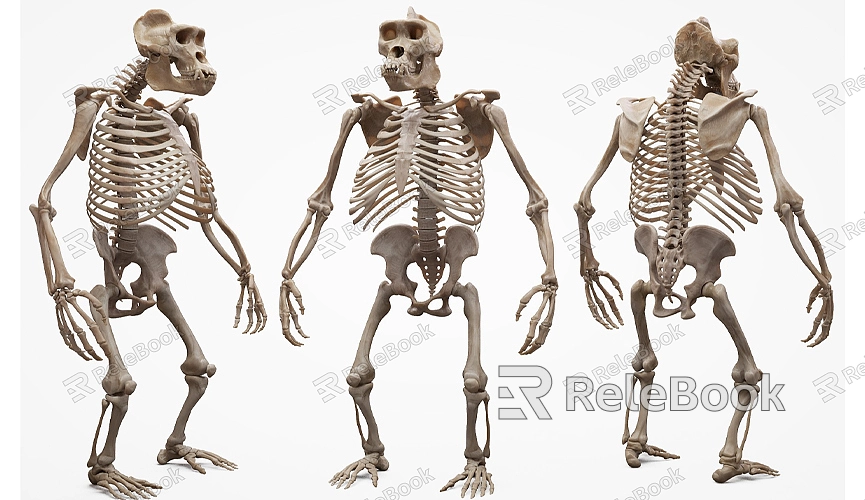
Before you begin creating a 3D skeleton model, it's essential to understand the anatomy of the human or animal skeleton. This knowledge not only helps you accurately shape the model but also ensures correct joint connections. You can research detailed skeletal structures through anatomy books, 3D scan data, or online resources.
Specifically, each part of the skeleton has a unique shape and function. For example, long bones like the femur and humerus are typically elongated and cylindrical, while flat bones like the scapula and pelvis are more complex with intricate shapes and curves. Mastering these details will significantly enhance the effectiveness of your modeling.
Choosing the Right Modeling Software
Selecting the right 3D modeling software is critical to completing your project. Here are some popular 3D modeling software options that provide powerful tools to help you create intricate skeleton models:
- Blender: This open-source 3D modeling software is comprehensive and free. Blender has robust sculpting and rigging features, making it ideal for creating complex skeleton models.
- Autodesk Maya: Widely used in film, animation, and game development, Maya is particularly suited for advanced users.
- ZBrush: Although primarily used for sculpting details, ZBrush’s high-resolution modeling capabilities make it perfect for creating skeletons with fine textures.
These tools offer extensive polygon modeling, texture mapping, and rendering capabilities to help you achieve high-quality 3D skeleton models.
Collecting and Organizing Reference Materials
Gathering reference materials is an indispensable step before you start modeling. Real skeletal models, high-definition anatomy charts, medical imaging, and even photos of skeletal exhibits from museums are valuable resources. These references are especially helpful when accuracy is critical, allowing you to capture skeletal details precisely.
Creating high-quality 3D models also relies on excellent resources. For instance, if you need to add high-quality textures to your model or simulate complex lighting environments, HDRI files are incredibly useful. If you need a large number of high-quality 3D textures and HDRI resources when creating models and virtual scenes, you can download them for free from [Relebook](https://textures.relebook.com/). For more exquisite 3D model resources, visit [Relebook](https://3dmodels.relebook.com/), which offers a vast array of premium 3D resources.
Creating Basic Skeletal Shapes
Once your reference materials are ready, you can begin creating the basic skeletal shapes in your modeling software. Most 3D modeling starts with simple geometric shapes like cubes, cylinders, or spheres. By modifying these basic shapes, you can gradually form the initial structure of the bones.
1. Building the Skeletal Framework
For long bones (such as the femur and humerus), start with a cylinder and adjust its proportions by stretching and bending to create the basic bone shape. Use the software’s subdivision features to further sculpt the bone to match the actual curves and forms.
For flat bones (such as the scapula or pelvis), begin with a flat shape, then use extrusion and stretching tools to sculpt the bone’s surface, ensuring it captures the complex contours and irregular outlines.
2. Using the Mirror Function
Skeleton models are typically symmetrical, especially in the limbs. By using the mirror function in your modeling software, you can easily duplicate and adjust the symmetrical bone parts. This not only saves time but also ensures symmetry and consistency in your model.
Adding Details and Sculpting

After completing the basic bone shapes, the next step is to add details. Sculpting these details will make your model more realistic and visually impactful. Cracks, holes, and small ridges on the bone surface are areas that require attention.
Use sculpting tools to further refine the bone surface. For example, the “brush” tool can simulate natural textures on the bone surface. High-resolution 3D texture maps can enhance the bone’s texture, making it look more realistic. This is where a high-quality texture library becomes invaluable.
Rigging and Animation Preparation
If your 3D skeleton model is intended for animation, rigging is a crucial step. Rigging involves creating virtual joints for the skeleton model, allowing it to move and pose naturally. With rigging, you can correctly connect joints to bones, enabling natural movement.
Most modeling software, such as Blender and Maya, come equipped with built-in rigging tools, making it easy to add joints to your model. You can adjust the range of motion for each joint according to your needs and test how the model performs in different poses.
Optimization and Rendering
Once the skeleton model is created and rigged, the next step is to optimize the model and perform the final rendering. The goal of optimization is to reduce the polygon count to improve rendering efficiency. You can use the automatic optimization function in your modeling software or manually remove unnecessary polygons.
Rendering is the process of converting a 3D model into a 2D image. During rendering, lighting and environmental settings are critical. To enhance realism, use HDRI lighting to perfectly blend the skeleton model with its surroundings. You can also adjust the position and intensity of light sources to create shadow effects that make the model appear more three-dimensional.
Creating a high-quality 3D skeleton model involves a series of meticulous steps, from gathering reference materials, choosing modeling tools, and creating basic shapes, to adding details, rigging, and rendering. Each step is crucial and directly impacts the final model's quality. If you want your model to be more vivid and realistic, selecting the right 3D resources is also key. If you need high-quality 3D textures and HDRI resources when creating models and virtual scenes, you can download them for free from [Relebook](https://textures.relebook.com/). If you need exquisite 3D models, you can also download them from [Relebook](https://3dmodels.relebook.com/), which offers a vast collection of premium 3D resources.
With the in-depth guidance provided in this article, you can master the entire process of creating a 3D skeleton model, further enhancing your 3D modeling skills. Continuous practice and in-depth research in real projects will allow you to make even greater progress.
